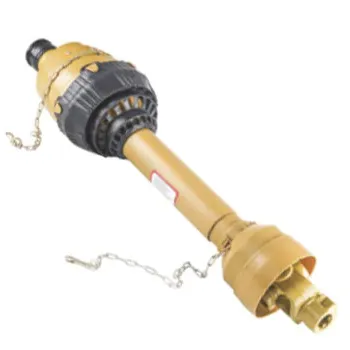
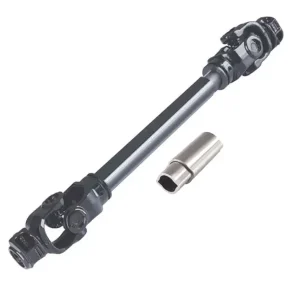
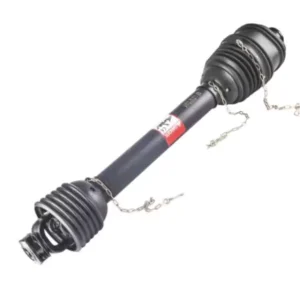
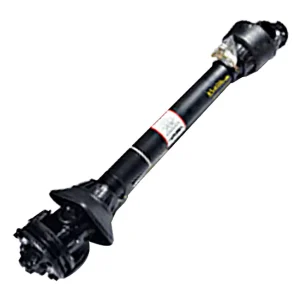
La mayoría de las fallas en campo de los sistemas de transmisión de la toma de fuerza (PTO) se deben a un conjunto reducido de causas principales: paredes de tubo delgadas, crucetas de baja calidad, equilibrio no probado y protectores frágiles. La siguiente tabla compara cada modo de falla común con la forma en que lo solucionamos en nuestra fábrica:
| Dimensión de comparación |
Eje de la toma de fuerza inferior |
Nuestro eje de toma de fuerza |
Beneficio en el mundo real |
| Retención de la tapa final |
Ajuste a presión, se suelta al impacto |
Tapón roscado + fijado con Loctite o tope de anillo de retención |
Cross permanece en el yugo, incluso después de una parada. |
| Material de cruce y cojinete |
Hierro fundido simple o acero de baja calidad |
20CrMnTi, carburizado + templado, superficie de 58–62 HRC |
La vida útil se extendió de 2 a 3 veces bajo la misma carga. |
| Calidad de los rodamientos de agujas |
Agujas sueltas sin marca |
Agujas enjauladas + sello de doble labio + grasa de por vida |
Intervalo de cambio de aceite reducido, sin fallos prematuros |
| Mecanizado de estrías |
Solo fresado, bordes ásperos, mal ajuste |
Mecanizado CNC, granallado, endurecido por inducción. |
Cero problemas desde el primer día; una relación perfecta para toda la vida. |
| Polímero de protección |
PVC o PE de baja calidad, quebradizo en frío, se decolora en 1 año. |
HDPE estabilizado contra rayos UV, probado contra impactos a -20 °C. |
Protege tu vida más allá de las 5 estaciones bajo el sol australiano. |
| Tolerancia de concentricidad |
Tubo fuera del eje, vibración a velocidad |
Concentricidad del tubo dentro de 0,15 mm/m |
Funcionamiento silencioso en todo el rango de velocidades. |
| Forjado de yugos |
Fundición en arena o forja de baja calidad |
Acero 42CrMo forjado en caliente, normalizado, granallado. |
La resistencia a la fatiga del yugo aumentó 40–80% |
| Coincidencia del dispositivo de seguridad |
Embrague genérico instalado independientemente |
Par de embrague calibrado según las especificaciones del implemento |
El embrague protege en lugar de patinar inútilmente. |
| Diseño de lubricación |
No hay boquillas de engrase en cruces sellados. |
Engrasador pasante por cada cruceta + tapas de extremo selladas |
El mantenimiento se puede realizar en el campo, no en el taller. |
| Pintura/acabado |
Pintura de una sola capa, se desconcha en meses. |
Imprimación cataforética KTL + recubrimiento en polvo de 80 µm |
Calidad visible después de 5 años en humedad costera. |
Principio de funcionamiento y posición de aplicación
The PTO drive shaft sits between the rear of the tractor and the front of the implement — specifically, between the tractor’s PTO output stub (1 3/8″ 6-spline at 540 rpm or 1 3/8″ 21-spline / 1 3/4″ 20-spline at 1000 rpm) and the input shaft of the heavy rotary tillers or other powered attachment. Power flows in one direction: Motor del tractor → Caja de cambios del tractor → Salida de la toma de fuerza (TDF) → Eje → Entrada del implemento → Herramienta de trabajo.
Mecánicamente, el eje tiene tres zonas, cada una de las cuales realiza una función específica:
- Las dos juntas universales En cada extremo, permiten que el eje transmita el par motor en un ángulo determinado. A medida que el tractor gira y el implemento se articula sobre terreno irregular, cada conjunto de cruceta y cojinete compensa esa desalineación angular, pero solo hasta unos 25° por articulación para una articulación estándar, o entre 35° y 45° para una junta homocinética de ángulo amplio.
- Los tubos telescópicos en el medio El eje cambia de longitud. Cuando el tractor supera una elevación y el implemento se queda atrás, el tubo exterior hembra y el tubo interior macho se separan; cuando el tractor y el implemento vuelven a alinearse, los tubos se juntan de nuevo. El perfil en forma de estrella, limón o estriado, fabricado mediante trefilado en frío, mantiene los tubos macho y hembra bloqueados en fase de rotación incluso durante el deslizamiento.
- El dispositivo de seguridad El embrague (de perno de seguridad, de fricción o de trinquete) se ubica en el extremo del implemento y es la última línea de defensa. Cuando el par del implemento excede el valor calibrado del embrague —por ejemplo, cuando una fresadora rotativa golpea una raíz enterrada—, el embrague patina, se rompe o se libera, desacoplando el implemento del tractor antes de que la caja de cambios pueda dañarse.
La protección de plástico de dos piezas es mecánica, no simbólica. Cada cono de plástico está sostenido por un collarín de cojinete sellado que gira sobre la horquilla giratoria; el cono permanece fijo mientras el eje gira en su interior. Una pequeña cadena ancla la protección a un punto fijo del tractor o implemento para que no pueda girar, incluso si los collarines de cojinete se desgastan. Si falta la cadena, falla todo el sistema de seguridad: la protección gira con el eje y cualquier prenda o extremidad suelta que entre en contacto con ella queda atrapada a las RPM de funcionamiento. Compruebe siempre que la cadena esté enganchada antes de accionar la toma de fuerza (PTO).
Compatibilidad de marcas, referencias cruzadas y repuestos
Muchos de nuestros clientes australianos utilizan una flota mixta de implementos europeos y norteamericanos, y necesitan un único proveedor que pueda encontrar repuestos compatibles con cualquier marca que estén reparando. Nuestro catálogo de tomas de fuerza (PTO) se corresponde con los principales fabricantes de la siguiente manera:
| Marca |
Serie de referencias cruzadas |
Notas |
| Bondioli y Pavesi |
B&P Serie 6 / Serie 8 gran angular |
Compatible directamente con plataformas OEM europeas |
| Walterscheid |
P200 / P300 / P400 / P600 |
La geometría del yugo coincide con la ficha técnica del fabricante. |
| Industrias Comer |
Serie M / Serie G / Serie S |
Referencia cruzada de alta resistencia para servicio de alto par |
| Eurocardán |
Gama de catálogo estándar |
Envolvente dimensional y de par equivalente |
| Weasler / Neapco |
Serie AB / Doméstico 12 / 14 |
Referencia cruzada de aranceles norteamericanos |
| Sparex / Granito |
Equivalentes del mercado de repuestos |
Códigos de referencia cruzada del distribuidor disponibles |
Todas las marcas y números de modelo mencionados se utilizan únicamente con fines de referencia e identificación. No estamos afiliados a estos fabricantes, y el uso de estos nombres no constituye una infracción de marca registrada.
Biblioteca de repuestos
Para los distribuidores y talleres que prefieren reparar en lugar de reemplazar, cada componente de este eje se vende como repuesto individual:
- Kit de cruceta y cojinete — Pieza de fácil reparación, generalmente la pieza con mayor rotación en el taller.
- Yugo (extremo del tractor o implemento) — Forjado en caliente, mecanizado, listo para instalar con una nueva cruz.
- Sección de tubo telescópica macho/hembra — se venden por longitud y perfil.
- Embrague de seguridad — Perno de seguridad, de fricción o de trinquete, se vende completo con resortes y discos de fricción.
- Cono de protección de plástico — Conos interior y exterior, con collares de cojinete, sujetadores y cadena.
- Cerradura de pasador/liberación rápida — Pieza de desgaste común, suministrada como un conjunto sellado.
- Kits de engrasadores y tapas de extremo — paquetes de repuesto de diez unidades.
Cumplimiento, Normas y Servicio Local Australiano
Este S series PTO shaft star tube Está diseñado, probado y documentado conforme a las normas internacionales y australianas pertinentes para los sistemas de transmisión de toma de fuerza (PTO):
- ISO 5673-1 y 5673-2 — Norma internacional que rige los ejes de transmisión de la toma de fuerza de la maquinaria agrícola y sus protecciones. Establece requisitos mínimos de dimensiones, rendimiento y protección.
- ASAE S331.5 / ISO 500 — define la interfaz dimensional para la salida de la toma de fuerza de los tractores agrícolas (1 3/8″-6, 1 3/8″-21, 1 3/4″-20 y 1 3/4″-6 estrías).
- EN 12965 — Directiva europea sobre la toma de fuerza (TDF) en tractores y maquinaria, incluyendo los requisitos de marcado, documentación y protección del operador.
- AS 2153 — Norma australiana para la seguridad de los tractores, con directrices específicas sobre la protección de la toma de fuerza y el espacio libre para el operador.
- Marcado CE Aplicable a todos los sistemas de seguridad; Marcado EAC Disponible para envíos a la Unión Aduanera Euroasiática bajo petición.
- ISO 9001:2015 Certificación de gestión de calidad en toda la planta de fabricación.
- RoHS La documentación de cumplimiento se proporciona a solicitud de los clientes OEM.
Notas australianas sobre el cumplimiento de las normas de seguridad y salud laboral
Las explotaciones agrícolas australianas están sujetas a la normativa de Seguridad y Salud en el Trabajo (SST), que incluye obligaciones específicas en materia de protección de maquinaria y formación de operadores para equipos accionados por toma de fuerza (TDF). Nuestros ejes de TDF se envían con protecciones que cumplen con la normativa SST, etiquetas de seguridad multilingües y un manual del operador en formato PDF en inglés. Los inspectores estatales verifican periódicamente la integridad de las protecciones durante las auditorías rutinarias de seguridad agrícola. Conserve la factura de compra y la etiqueta de calibración con código QR junto con el implemento para demostrar el cumplimiento de la normativa durante la inspección.
Suministramos habitualmente Eje de toma de fuerza en Australia, repuestos para tractores en Australia Occidental, repuestos para maquinaria agrícola en Australia Meridional, suministros agrícolas en Tasmania.Los plazos de entrega a Brisbane, Sídney, Melbourne, Adelaida, Perth, Darwin y Hobart son de 25 a 35 días puerta a puerta para envíos FCL y de 35 a 45 días para consolidaciones LCL.
Guía de selección: Cómo elegir el eje de toma de fuerza (PTO) adecuado
Utilice la lista de verificación de 10 pasos que aparece a continuación para confirmar todas las dimensiones antes de realizar su pedido. Lamentablemente, uno de los problemas más comunes de devolución y reemplazo en el sector de la transmisión agrícola es el eje de la toma de fuerza incorrecto, y casi todos los casos de ajuste incorrecto se deben a que se omitió algún paso de esta lista.
| Paso |
Acción |
Qué confirmar |
Consejo práctico |
| 1 |
Medir el extremo de la toma de fuerza del tractor |
Identifique “1 3/8″ 6-spline”, “1 3/8″ 21-spline” o “1 3/4″ 20-spline” utilizando un calibrador de estrías o un nonio. |
Las splines que no coinciden son el error de ordenación más común. |
| 2 |
Eje de entrada del implemento de medición |
Siga el mismo procedimiento en la entrada de la caja de engranajes del implemento: observe tanto el patrón de estrías como cualquier ranura de bloqueo. |
Las estrías del extremo del implemento suelen ser diferentes a las del extremo del tractor. |
| 3 |
Mide la longitud cerrada |
Con el implemento a la distancia mínima de operación, mida la distancia entre los hombros de ambos yugos. |
La longitud cerrada establece la longitud mínima a la que debe comprimirse el eje. |
| 4 |
Mida la longitud extendida |
Levante, pliegue o gire el implemento hasta alcanzar la geometría máxima y vuelva a medir. |
La longitud extendida establece el solapamiento mínimo que deben mantener los tubos telescópicos. |
| 5 |
Determinar el requerimiento de energía |
Utilice la potencia nominal en kW del implemento y la velocidad de la toma de fuerza del tractor (540 / 1000 rpm) para calcular la serie necesaria. |
El dimensionamiento de la serie por debajo de las especificaciones provoca fallos por fatiga en el plazo de una temporada. |
| 6 |
Elija un dispositivo de seguridad |
Seleccione la herramienta adecuada: perno de corte para cargas constantes, fricción para cargas de impacto, trinquete para cargas puntuales ocasionales. |
Un embrague del tipo incorrecto no ofrece la protección necesaria o patina bajo carga normal. |
| 7 |
Seleccione la conexión rápida del yugo |
Pasador de presión (más ligero), pasador de perno (uso intensivo), collarín de bola (desconexión frecuente) o liberación rápida (desconexión horaria). |
Elija la opción que mejor se adapte a la rutina diaria del operador, no la más barata. |
| 8 |
Confirmar el ángulo de funcionamiento |
Recorra las posiciones más largas y más cortas de los implementos, midiendo el ángulo del eje en cada articulación. |
El funcionamiento prolongado a más de 35° por junta reduce la vida útil a la mitad. |
| 9 |
Decidir sobre el sistema de vigilancia |
La protección estándar ISO 5673 se adapta a la mayoría de las cajas 95%; en entornos de alto desgaste, puede ser conveniente una protección reforzada de triple cono. |
Las protecciones dañadas deben reemplazarse; no son opcionales. |
| 10 |
Confirmar las necesidades de certificación |
Los clientes de la UE necesitan la certificación CE; los compradores australianos hacen referencia cruzada a la norma AS 2153; algunos mercados requieren la certificación EAC. |
La discrepancia en la certificación puede retrasar el despacho de aduanas. |
Selector rápido de 3 pasos: cuando tienes prisa.
- Medida — closed length from PTO stub face to implement input shoulder, with the implement at minimum operating distance.
- Fósforo — spline pattern at both ends + yoke style (push pin / bolt pin / quick release).
- Verify — power band of the tractor (HP @ 540 or 1000 rpm) and choose the safety device that matches the implement (shear-bolt for steady loads, friction for shock).
If any one of those three is uncertain, send us photos of your tractor PTO stub and the implement input shaft, with a tape measure visible. We will respond with a recommended SKU within one business day.
Step-by-Step Installation Guide
⚠️ Safety First. Before any work, switch off the tractor engine, remove the key, engage the parking brake, and wait for all rotating components to stop. Never reach toward an unguarded PTO stub. Wear close-fitting clothing, safety boots and gloves throughout.
- Pre-installation safety checks. Engine off; key out of ignition; parking brake on; PTO disengaged at the cab lever. Confirm there is no one between the tractor and implement before beginning.
- Verify dimensions. With the implement at minimum operating distance, lay the new PTO shaft along the gap and confirm closed-length compression and spline-end matching. If the shaft is too long, do not force it — contact us for the correct length or for cut-to-fit instructions.
- Connect the tractor end first. Press the push-pin (or release the bolt-pin / quick-release collar), align the spline, push the yoke onto the PTO stub until the lock engages with an audible click. Pull back firmly to confirm the lock has seated.
- Connect the implement end. Repeat the same procedure on the implement input shaft. The two ends are not interchangeable — install the marked tractor-end yoke on the tractor, and the marked implement-end yoke on the implement.
- Anchor both guard chains. The plastic guard cones each carry a small chain. Hook each chain to a fixed point — never to the rotating shaft itself. The chain must hold the guard stationary while the shaft rotates inside it.
- Length verification. With the tractor and implement in their normal operating positions, confirm telescoping overlap is at least 1/3 of the male tube length. With the implement at maximum reach, confirm the tubes are not bottoming out (no metal-to-metal contact at minimum overlap).
- Operating-angle check. Walk the implement through its full geometry (lift, lower, fold, turn). Each universal joint should not exceed 35° at any point under load — for sustained operation, keep angles under 25° per joint.
- Initial lubrication. Apply 4–6 pumps of EP-2 lithium grease to each cross-and-bearing nipple, rotating the shaft 90° between pumps to fill all four needle bearings. Apply a thin film of grease to the male telescoping tube. Wipe excess.
- Final pre-start check. All chains hooked? Both yoke locks engaged? Guards intact? Operator clear? Only then enter the cab, start the engine and engage PTO at idle RPM for the first 10 seconds before ramping up.
PTO Troubleshooting Guide — 10 Field-Tested Fixes
Common PTO issues, their root causes, the field fix, and the prevention step that stops them coming back.
| Symptom |
Likely Cause |
Solution |
Prevention |
| Shear-bolt failing repeatedly within minutes of starting |
Wrong grade or diameter of bolt installed; implement bearing seized or transmission jammed; impact load from rocks in the field |
Verify the bolt is the correct grade specified on the clutch label (typically 8.8 or 10.9); inspect the implement for free rotation; clear any obstructions before re-engaging PTO. |
Carry only the specified shear bolts in the toolkit and never substitute hardware-store bolts of unknown grade. |
| Friction clutch slipping under normal load |
Friction discs glazed from prolonged slip, oil contamination on the friction surfaces, or springs fatigued |
Loosen the spring bolts, separate the discs, lightly hand-sand the friction faces with 80-grit paper, clean with brake-cleaner and re-tension to the torque on the clutch label. |
Run a 10-second slip routine at the start of every season to ‘bed-in’ the discs and verify spring tension annually. |
| High-load power transmission insufficient — tractor lugs down |
PTO shaft under-rated for the implement; tube wall thickness too thin; clutch slipping unnoticed |
Re-evaluate the implement’s torque draw and step up to the next series shaft; verify clutch is engaging fully and not slipping. |
When in doubt, oversize the shaft series rather than under-spec — the marginal cost of a heavier model is far less than a field failure. |
| Tractor rear axle vibrating at PTO speed |
Shaft out of dynamic balance after repair; cross-pair installed 90° out of phase; bent tube |
Send the shaft to a balancing shop; verify both yokes are aligned ‘in phase’ (the lugs of both yokes parallel); replace any bent tube. |
Mark both yokes with a paint stripe before disassembly so they can be re-installed in their original phase relationship. |
| Visible torsion deformation along the tube length |
Sustained torque overload from a stalled implement; or an undersized shaft for the application |
Replace the entire tube section — a torsioned tube cannot be straightened safely; revisit the shaft sizing. |
Listen for the characteristic ‘crack’ of a stall and disengage PTO immediately; never try to ‘power through’ a jammed implement. |
| Excessive grease ejected from cross at first start |
Over-greasing during last service; thermal expansion of grease in cold conditions |
Wipe excess grease away; if joint runs cool, reduce next service to 3 pumps per cross. |
In cold climates use a Grade 0 or 00 grease to prevent excessive ejection on cold starts. |
| Free-wheeling/over-running clutch grabbing in reverse |
Pawl springs fatigued or pawl seats worn from sustained reverse-load contact |
Replace the over-running clutch as a sealed unit and verify implement decelerates smoothly without back-driving. |
On hay and silage rakes, idle the engine for 5 seconds before disengaging PTO so the over-runner can release naturally. |
| Slip-clutch heat marks (blueing) on friction discs |
Discs slipping continuously above their rated heat-dissipation limit |
Replace the friction discs and re-tension springs; review whether the implement is being asked to do more than its design allows. |
If slip occurs more than briefly at start-up, the clutch is undersized — upgrade to the next series. |
| Shielding rotating with the shaft instead of remaining stationary |
Bearing collars on the guard worn or seized; safety chain missing or broken |
Replace the bearing collars on the inner and outer cones; install or replace the safety chain hooking the guard to a fixed point. |
Check the safety chain at every connection — a stationary guard is the single biggest factor in PTO-related injury prevention. |
| Plastic guard cracked or shattered along the seam |
UV degradation after multiple seasons, impact damage from a rock strike, or a guard chain hooked onto the implement and rotated with the shaft |
Replace the guard cone immediately; verify the safety chain is hooked to a fixed point on the tractor or implement, never to the rotating shaft. |
Inspect guards daily, store the shaft out of direct sun when possible, and request a UV-stabilised guard for high-UV regions. |
Engineer Field Notes — Australian Customer Case Studies
Five real installations across Australia — different farm types, different climates, different demands on the driveline. Customer initials used to protect privacy.
Dubbo, NSW — Wheat-Belt Grain Operation
Customer type: Broadacre Cropping Company · Reference: C.N.
Use: Mounted on the heavy rotary tillers for paddock-scale operation.
“Hooked it to a New Holland T7.245 130-HP machine for the first time last week. Smooth as silk.”
⭐ Rating: ★★★★★ (5.0/5.0) · Purchased: Sep 2024 · Qty: 2 pc
Darwin, NT — Mango & Cattle Station
Customer type: Remote-Region Operator · Reference: R.T.
Use: Mounted on the heavy rotary tillers for paddock-scale operation.
“Customer service stayed with us through three rounds of drawing changes. Final shaft fit on the first try.”
⭐ Rating: ★★★★★ (5.0/5.0) · Purchased: Nov 2024 · Qty: 4 pc
Tamworth, NSW — Lucerne Hay & Beef
Customer type: Stud Beef Breeder · Reference: K.O.
Use: Mounted on the heavy rotary tillers for paddock-scale operation.
“I was sceptical of imported gear but the build quality is on par with anything from Europe at half the price.”
⭐ Rating: ★★★★★ (5.0/5.0) · Purchased: Feb 2025 · Qty: 6 pc
Cairns, QLD — Tropical Fruit & Cane
Customer type: Tropical-Fruit Grower · Reference: J.M.
Use: Mounted on the heavy rotary tillers for paddock-scale operation.
“We’ve put it on the heavy every season for 4 seasons now. Same shaft, same performance.”
⭐ Rating: ★★★★½ (4.5/5.0) · Purchased: May 2025 · Qty: 12 pc
Swan Hill, VIC — Irrigated Horticulture
Customer type: Irrigated Grower · Reference: S.K.
Use: Mounted on the heavy rotary tillers for paddock-scale operation.
“The clutch is calibrated exactly right. It slips when it should and bites when it should — that’s the difference.”
⭐ Rating: ★★★★★ (5.0/5.0) · Purchased: Aug 2025 · Qty: 18 pc
Preguntas frecuentes
Three questions we hear most often from buyers — tap to expand.
❓ How do I choose between a shear-bolt clutch and a friction clutch?
Shear-bolt clutches are the simplest, lowest-cost protection — when torque exceeds the bolt’s shear strength, the bolt fails and disengages drive. They are best for predictable loads such as fertiliser spreaders, irrigation pumps and small flail mowers. Friction clutches absorb short overload spikes by slipping for fractions of a second, making them ideal for impact-prone tools such as rotary tillers, balers and disc mowers where rocks or hard wood can be hit. We will recommend the clutch type based on your implement’s specifications: please tell us the working torque, peak torque (if known) and the type of impact loads encountered, and we will size the clutch accordingly.
❓ What kind of warranty and after-sales support is included?
Each PTO shaft carries a 12-month workmanship warranty from the date of invoice covering yokes, cross & bearing kits, tubes and shielding. Wear items damaged through misuse — such as a friction clutch operated outside its torque rating — are replaced at cost. Our spare-parts library carries every component used in production, so dealers can hold a small kit (cross & bearing, yoke, push pin, guard cone) and service most failures locally. We also provide free technical support over WhatsApp and email, including video walk-throughs of installation, lubrication and shear-bolt replacement.
❓ How do I prevent premature wear on the cross & bearing assemblies?
Three habits do most of the work: lubricate at the correct interval (every 8 to 50 operating hours depending on the cross design), keep operating angles below 35° per joint at full load, and never apply full PTO power until the shaft is rotating. Greasing technique matters — give each cross 4 to 6 pumps of an EP-2 lithium grease, rotating the joint between pumps so all four bearings are reached. After washing the implement, run the PTO at low speed for a minute to displace any water that has migrated past the seals. These three steps alone typically extend cross-and-bearing life by 60% over field-average.
Related Products from Our Catalogue
The PTO drive shaft is one piece of a larger driveline puzzle. We also manufacture the matching gearboxes, sprockets, chains, gears, pulleys and bearings that work with this shaft as a complete power-transmission system.
- Agricultural Gearbox — engineered to mate with this PTO shaft on rotary cutters, irrigation pumps and pickup-baler input drives.
- ⚙️ PTO Shaft Spare Parts — cross & bearing kits, replacement yokes, telescoping tubes, guard cones and friction-clutch service kits, all interchangeable with this shaft.
- Piñones agrícolas — the matching driven-side sprockets for chain-driven implements that take their power off this shaft.
- Gears — bevel, helical and spur gears for in-line gearbox stages downstream of the PTO.
- ⛓️ Cadenas de rodillos — agricultural-grade roller chains for chain drives off this shaft.
- Pulleys — V-belt and timing pulleys for the auxiliary drives some implements take off the PTO.
- Cojinetes y bujes — needle, taper, ball and bushed bearings used in the PTO ecosystem.
Why Order from Us — Manufacturing Capacity, Engineering Depth, Speed
Founded in 2003, our facility in Hangzhou now operates 22 CNC machining lines, four dedicated PTO assembly cells, two dynamic-balancing benches and a 4,000 m² warehouse. Annual capacity exceeds 280,000 PTO shafts and 60,000 agricultural gearboxes. Our products are exported to 38 countries — Australia, New Zealand, Germany, the United States, Brazil, Russia, South Africa and many others. The engineering team holds 11 utility-model patents and has supplied private-label drivelines to three top-10 European agricultural OEMs.
We do more than supply standard PTO shafts. Our in-house tooling shop builds yoke dies, broaches and balancing fixtures for non-standard requirements at no extra cost above 200 pieces — talk to us about your specs.
⏱ We respond to every enquiry within 24 hours.