Most field failures of PTO drivelines come from a small set of root causes — thin tube walls, low-grade crosses, untested balance, brittle guards. The table below compares each common failure mode to how we engineer it out at our factory:
| Comparison Dimension |
Inferior PTO Shaft |
Our PTO Shaft |
Real-World Benefit |
| Tube wall thickness |
2.0–2.5 mm thin wall, twists under load |
3.5–7.0 mm cold-drawn seamless tube |
30–60% longer fatigue life |
| Cross & bearing material |
Plain cast iron or low-grade steel |
20CrMnTi, carburised + quenched, 58–62 HRC surface |
Cross-life extended 2–3× under same load |
| Needle bearing quality |
Loose unbranded needles |
Caged needles + double-lip seal + lifetime grease |
Reduced grease-service interval, no premature failure |
| Spline machining |
Hobbed only, rough edges, poor fit |
CNC broached, shot-peened, induction-hardened |
Zero backlash on day one; smooth coupling for life |
| Guard polymer |
PVC or low-grade PE, brittle in cold, fades in 1 year |
UV-stabilised HDPE, –20 °C impact-tested |
Guard life beyond 5 seasons in Australian sun |
| Equilíbrio dinâmico |
Untested or imbalanced |
Each section balanced to G6.3 (G2.5 on premium) |
No vibration, no axle bearing wear |
| Yoke forging |
Sand cast or low-grade forging |
Drop-forged 42CrMo, normalised, shot-peened |
Yoke fatigue resistance increased 40–80% |
| Safety device matching |
Generic clutch installed regardless |
Clutch torque calibrated to implement specification |
Clutch protects rather than slips uselessly |
| Lubrication design |
No grease nipples on sealed crosses |
Through-bore grease nipple per cross + sealed end caps |
Maintenance can be done in-field, not at the workshop |
| Painting/finish |
Single-layer paint, chips off in months |
KTL cataphoretic primer + 80 µm powder coat |
Visible quality after 5 years in coastal humidity |
Working Principle & Application Position
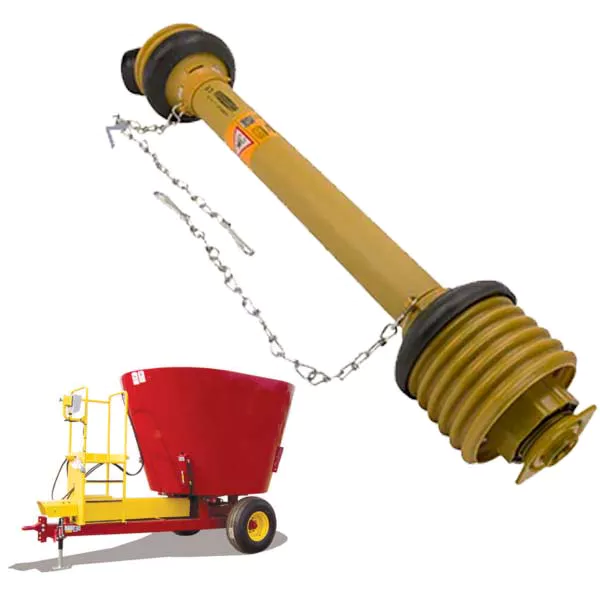
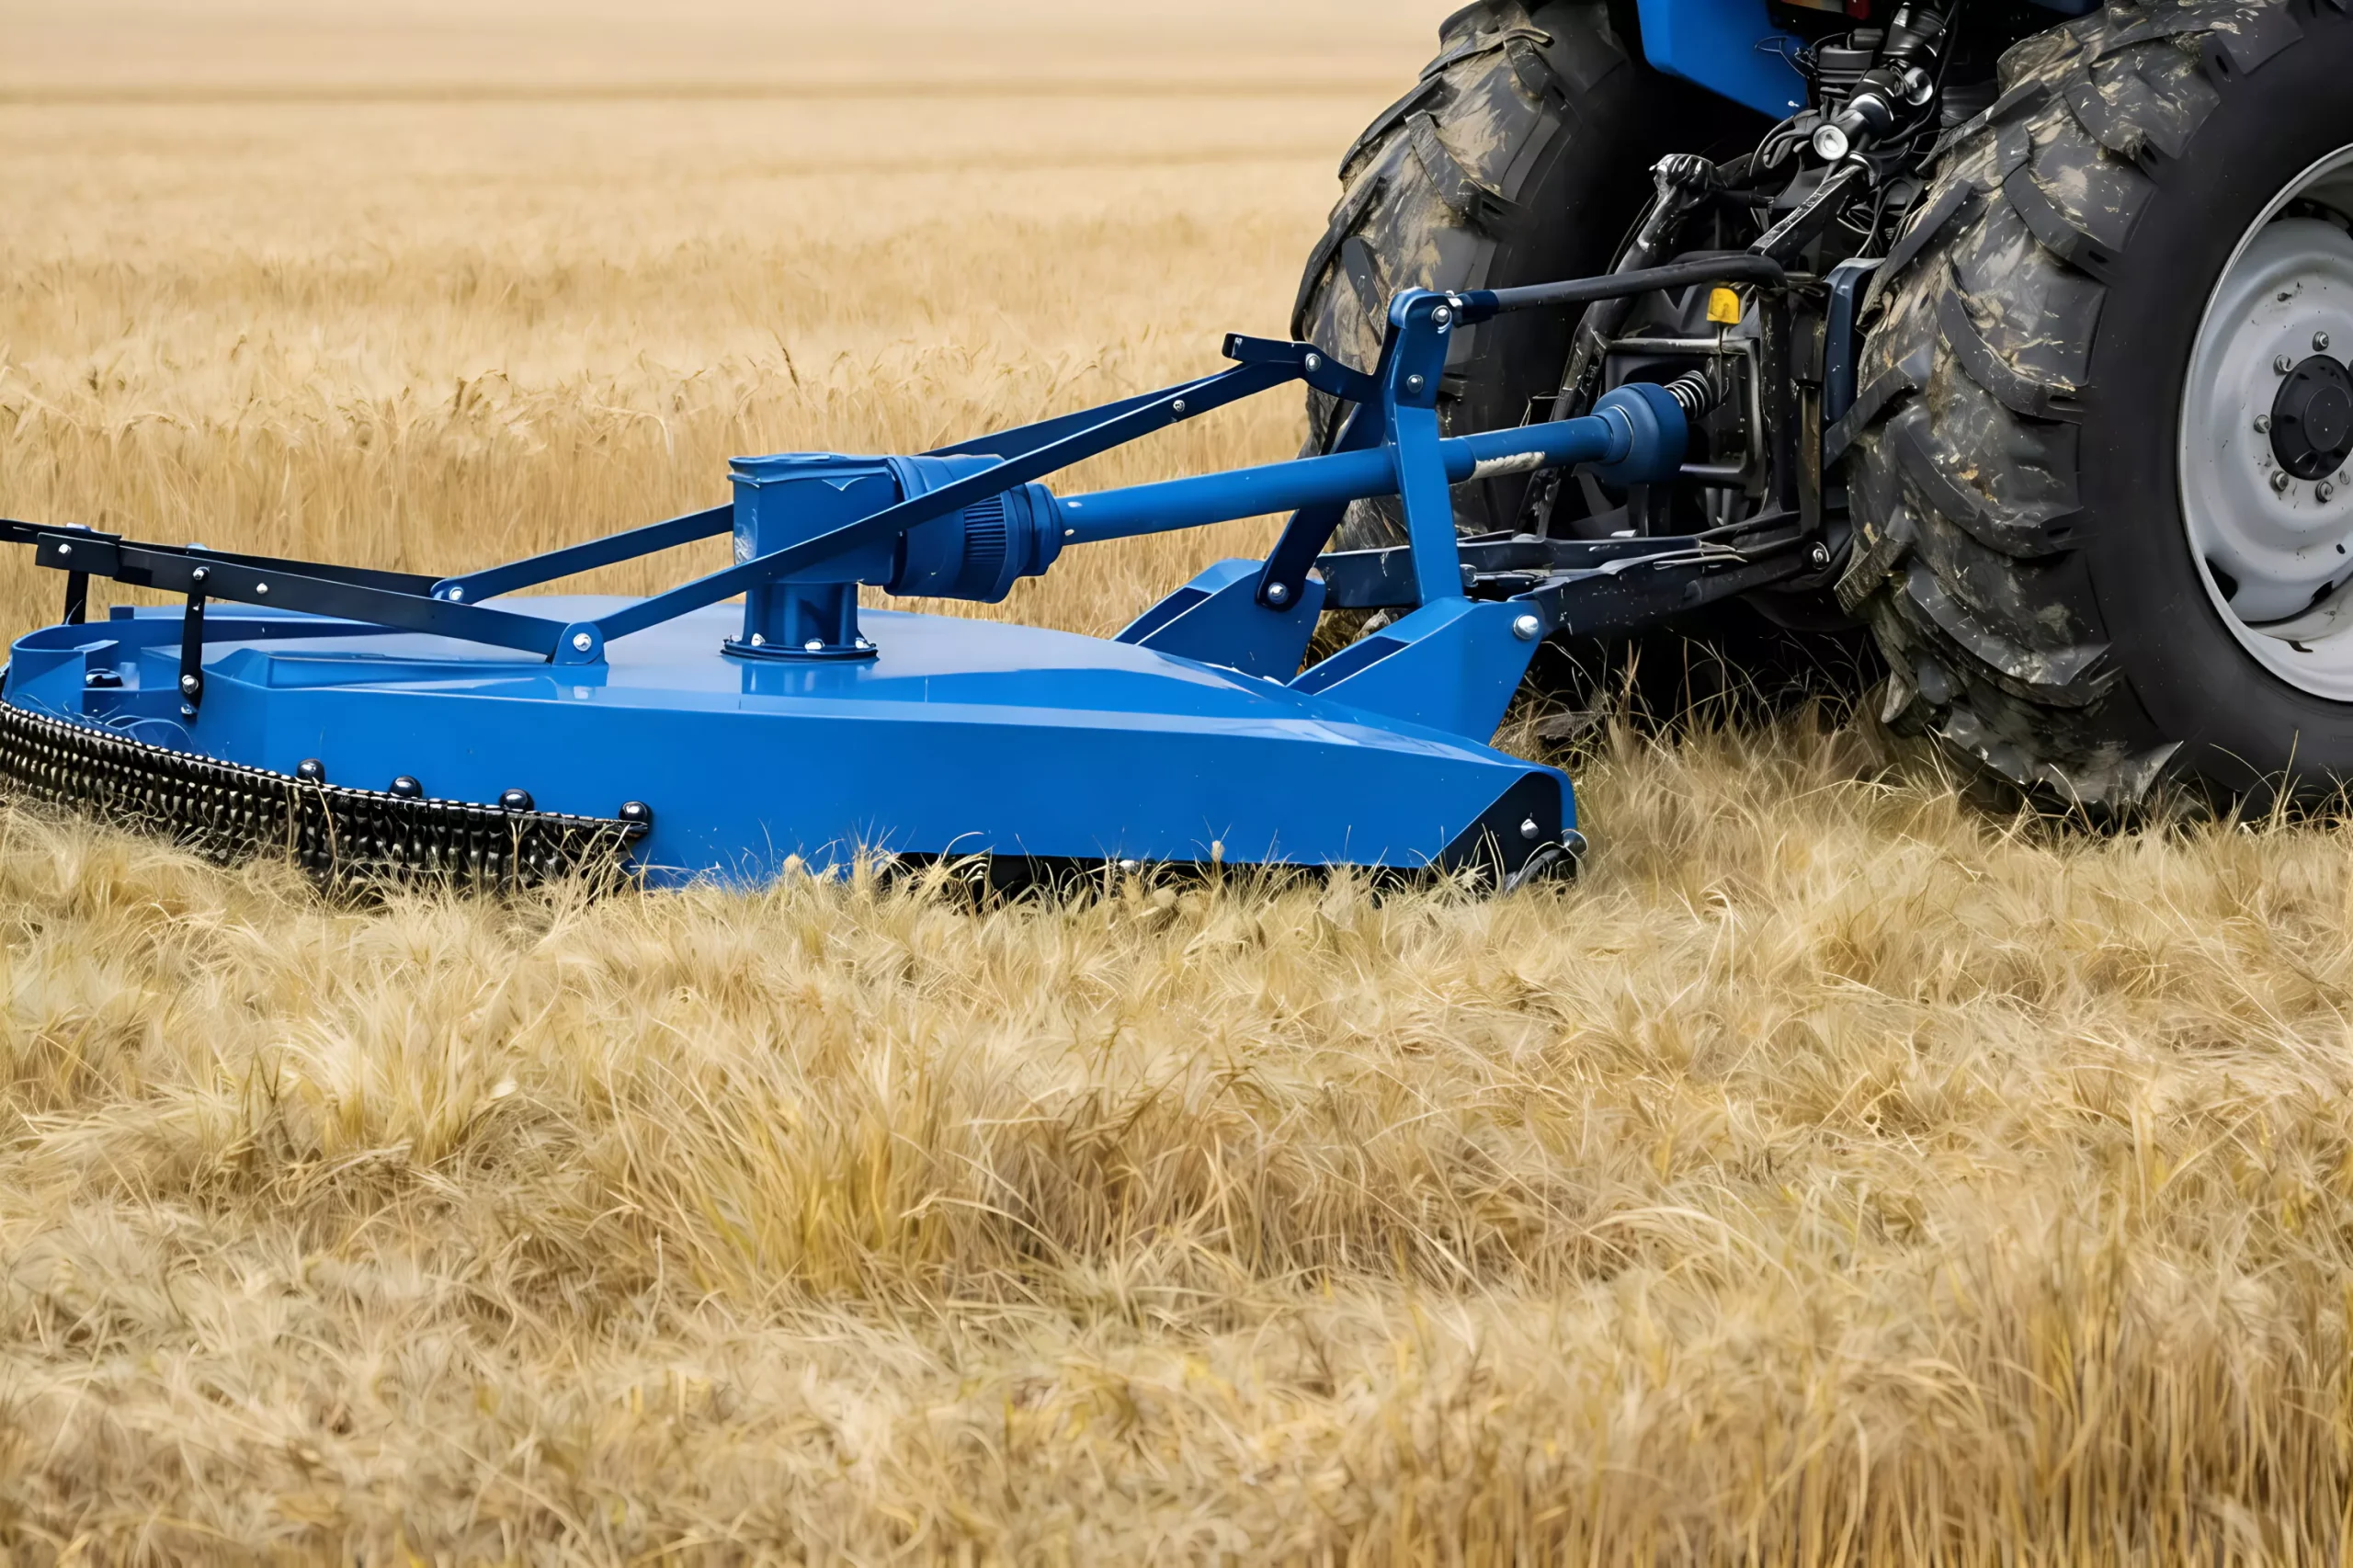
The PTO drive shaft sits between the rear of the tractor and the front of the implement — specifically, between the tractor’s PTO output stub (1 3/8″ 6-spline at 540 rpm or 1 3/8″ 21-spline / 1 3/4″ 20-spline at 1000 rpm) and the input shaft of the Supreme 700T or other powered attachment. Power flows in one direction: tractor engine → tractor gearbox → PTO output → shaft → implement input → working tool.
Mechanically, the shaft has three zones, each doing a specific job:
- The two universal joints at each end allow the shaft to transmit torque around an angle. As the tractor turns and the implement articulates over uneven ground, each cross-and-bearing assembly compensates for that angular misalignment — but only up to about 25° per joint for a standard joint, or 35–45° for a wide-angle CV joint.
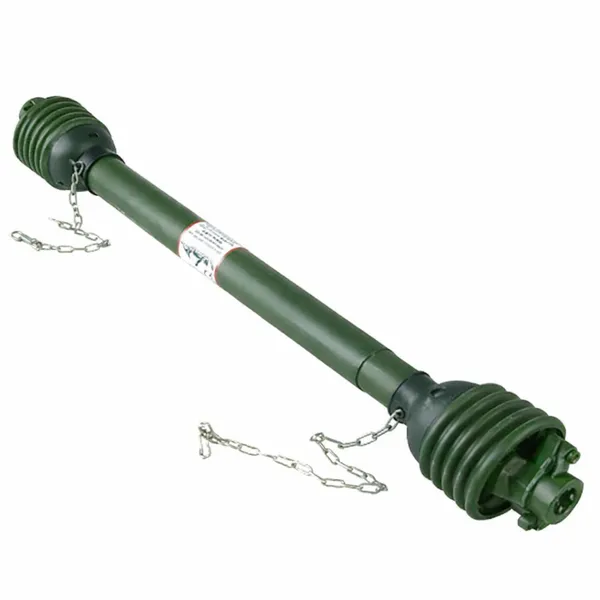
- The telescoping tubes in the middle let the shaft change in length. When the tractor crests a rise and the implement drops behind, the female outer tube and the male inner tube slide apart; when the tractor and implement come back into alignment, the tubes slide back together. The cold-drawn star, lemon or splined profile keeps the male and female tubes locked in rotational phase even as they slide.
- The safety device (shear-bolt, friction or ratchet clutch) sits at the implement end and is the last line of defence. When implement torque exceeds the clutch’s calibrated value — for example when a rotary tiller hits a buried root — the clutch slips, shears or releases, decoupling the implement from the tractor before the gearbox can be damaged.
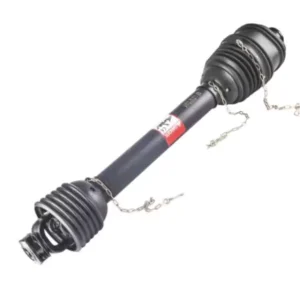
The two-piece plastic shielding is mechanical, not symbolic. Each plastic cone is supported by a sealed bearing collar that runs on the rotating yoke; the cone itself stays still while the shaft spins inside it. A small chain anchors the guard to a fixed point on the tractor or implement so the guard cannot rotate even if the bearing collars wear. If the chain is missing, the entire safety system fails: the guard rotates with the shaft, and any loose clothing or limb that contacts it is wrapped at the operating RPM. Always confirm the chain is hooked before engaging PTO.
Brand Compatibility, Cross-Reference & Spare Parts
Many of our Australian customers are running a mixed fleet of European and North-American implements and need a single supplier that can cross-reference replacements to whichever brand they’re servicing on the day. Our PTO catalogue maps to the major manufacturers as follows:
| Marca |
Cross-Reference Series |
Notas |
| Bondioli & Pavesi |
Series 1 / 2 / 3 / 4 / 5 / 6 |
Direct dimensional match on closed/extended length and yoke pattern |
| Walterscheid |
W2100 / W2200 / W2300 / W2400 / W2500 / W2600 |
Same cross-and-bearing kit dimensions; yokes interchangeable |
| Comer Industries |
T-series / V-series |
Tube profile and clutch torque ratings cross-referenced |
| Weasler |
1000 / 2000 / 3000 / 4000 series |
Replacement-grade equivalent for North-American duty |
| Neapco |
10 / 20 / 30 series |
Cross-and-bearing kit dimensionally identical |
| Binacchi |
Standard catalogue |
Italian-spec replacements available on request |
All brand names and model numbers mentioned are for cross-reference and identification purposes only. We are not affiliated with these manufacturers, and the use of these names does not constitute trademark infringement.
Spare-Parts Library
For dealers and workshops that prefer to repair rather than replace, every component of this shaft is sold as an individual spare:
- Cross & bearing kit — drop-in repair item, typically the highest-turnover part in the workshop.
- Yoke (tractor or implement end) — drop-forged, machined, ready to install with new cross.
- Telescoping male / female tube section — sold by length and profile.
- Safety clutch — shear-bolt, friction or ratchet, sold complete with springs and friction discs.
- Plastic shielding cone — inner and outer cones, with bearing collars, fasteners and chain.
- Push-pin / quick-release lock — common wear item, supplied as a sealed assembly.
- Grease nipples and end-cap kits — bag-of-ten replacement packs.
Compliance, Standards & Local Australian Service
This PTO shaft for Supreme feed mixer is engineered, tested and documented against the international and Australian standards relevant to PTO drivelines:
- ISO 5673-1 & 5673-2 — the international standard governing agricultural-machinery PTO drive shafts and their guards. Sets minimum dimensional, performance and shielding requirements.
- ASAE S331.5 / ISO 500 — defines the dimensional interface for the PTO output of agricultural tractors (1 3/8″-6, 1 3/8″-21, 1 3/4″-20 and 1 3/4″-6 splines).
- EN 12965 — European tractor-and-machinery PTO directive, including marking, documentation and operator-protection requirements.
- AS 2153 — Australian Standard for tractor safety, with specific guidance on PTO guarding and operator clearance.
- Marcação CE applied to every guard system; EAC marking available for Eurasian Customs Union shipments on request.
- ISO 9001:2015 quality-management certification across the manufacturing facility.
- RoHS compliance documentation supplied on request for OEM customers.
Australian WHS Compliance Notes
Australian farms are subject to the Work Health and Safety (WHS) regulations, which include specific obligations around plant guarding and operator training for PTO-driven machinery. Our PTO shafts ship with WHS-compliant guarding, multilingual safety decals and an operator-handbook PDF in English. State-level inspectorates regularly verify guard integrity during routine farm-safety audits — keep your purchase invoice and the QR-coded calibration tag with the implement to demonstrate compliance during an inspection.
We routinely supply PTO shaft Australia, agricultural PTO shaft supplier Australia, Queensland farm equipment, NSW agricultural parts, Victoria tractor parts. Lead times to Brisbane, Sydney, Melbourne, Adelaide, Perth, Darwin and Hobart are 25–35 days door-to-door for FCL shipments and 35–45 days for LCL consolidations.
Selection Guide — How to Choose the Right PTO Shaft
Use the 10-step pre-purchase checklist below to confirm every dimension before placing an order. The wrong PTO shaft is unfortunately one of the most common return-and-replace items in the agricultural-driveline trade, and almost every wrong-fit case traces back to a missed step from this list.
| Step |
Action |
What to Confirm |
Practitioner Tip |
| 1 |
Measure tractor PTO stub |
Identify “1 3/8″ 6-spline”, “1 3/8″ 21-spline” or “1 3/4″ 20-spline” using a spline gauge or vernier. |
Mismatched splines are the most common ordering error. |
| 2 |
Measure implement input shaft |
Same procedure on the implement’s gearbox input — note both the spline pattern and any locking groove. |
Implement-end splines often differ from the tractor end. |
| 3 |
Measure closed length |
With the implement at minimum operating distance, measure shoulder-to-shoulder of both yokes. |
Closed length sets the minimum length your shaft must compress to. |
| 4 |
Measure extended length |
Lift, fold or pivot the implement to maximum geometry and re-measure. |
Extended length sets the minimum overlap the telescoping tubes need to keep. |
| 5 |
Determine power requirement |
Use the implement’s rated kW and tractor PTO speed (540 / 1000 rpm) to calculate required series. |
Sizing the series under-spec leads to fatigue failures within a season. |
| 6 |
Choose safety device |
Match the implement: shear-bolt for steady loads, friction for shock loads, ratchet for occasional spike loads. |
The wrong clutch type either fails to protect or slips under normal load. |
| 7 |
Choose yoke quick-connect |
Push-pin (lighter), bolt-pin (heavy duty), ball-collar (frequent disconnect) or quick-release (hourly disconnect). |
Choose for the operator’s daily routine, not the cheapest option. |
| 8 |
Confirm operating angle |
Walk the longest and shortest implement positions, measuring shaft angle at each joint. |
Sustained operating beyond 35° per joint cuts cross life by half. |
| 9 |
Decide on guard system |
Standard ISO 5673 guard fits 95% of cases; high-wear environments may want a triple-cone heavy-duty guard. |
Damaged guards must be replaced — they are not optional. |
| 10 |
Confirm certification needs |
EU customers need CE; Australian buyers cross-reference AS 2153; some markets require EAC. |
Certification mismatch can stall customs clearance. |
3-Step Quick Selector — When You’re in a Hurry
- Medir — closed length from PTO stub face to implement input shoulder, with the implement at minimum operating distance.
- Corresponder — spline pattern at both ends + yoke style (push pin / bolt pin / quick release).
- Verify — power band of the tractor (HP @ 540 or 1000 rpm) and choose the safety device that matches the implement (shear-bolt for steady loads, friction for shock).
If any one of those three is uncertain, send us photos of your tractor PTO stub and the implement input shaft, with a tape measure visible. We will respond with a recommended SKU within one business day.
Step-by-Step Installation Guide
⚠️ Safety First. Before any work, switch off the tractor engine, remove the key, engage the parking brake, and wait for all rotating components to stop. Never reach toward an unguarded PTO stub. Wear close-fitting clothing, safety boots and gloves throughout.
- Pre-installation safety checks. Engine off; key out of ignition; parking brake on; PTO disengaged at the cab lever. Confirm there is no one between the tractor and implement before beginning.
- Verify dimensions. With the implement at minimum operating distance, lay the new PTO shaft along the gap and confirm closed-length compression and spline-end matching. If the shaft is too long, do not force it — contact us for the correct length or for cut-to-fit instructions.
- Connect the tractor end first. Press the push-pin (or release the bolt-pin / quick-release collar), align the spline, push the yoke onto the PTO stub until the lock engages with an audible click. Pull back firmly to confirm the lock has seated.
- Connect the implement end. Repeat the same procedure on the implement input shaft. The two ends are not interchangeable — install the marked tractor-end yoke on the tractor, and the marked implement-end yoke on the implement.
- Anchor both guard chains. The plastic guard cones each carry a small chain. Hook each chain to a fixed point — never to the rotating shaft itself. The chain must hold the guard stationary while the shaft rotates inside it.
- Length verification. With the tractor and implement in their normal operating positions, confirm telescoping overlap is at least 1/3 of the male tube length. With the implement at maximum reach, confirm the tubes are not bottoming out (no metal-to-metal contact at minimum overlap).
- Operating-angle check. Walk the implement through its full geometry (lift, lower, fold, turn). Each universal joint should not exceed 35° at any point under load — for sustained operation, keep angles under 25° per joint.
- Initial lubrication. Apply 4–6 pumps of EP-2 lithium grease to each cross-and-bearing nipple, rotating the shaft 90° between pumps to fill all four needle bearings. Apply a thin film of grease to the male telescoping tube. Wipe excess.
- Final pre-start check. All chains hooked? Both yoke locks engaged? Guards intact? Operator clear? Only then enter the cab, start the engine and engage PTO at idle RPM for the first 10 seconds before ramping up.
PTO Troubleshooting Guide — 10 Field-Tested Fixes
Common PTO issues, their root causes, the field fix, and the prevention step that stops them coming back.
| Symptom |
Likely Cause |
Solução |
Prevention |
| Shear-bolt failing repeatedly within minutes of starting |
Wrong grade or diameter of bolt installed; implement bearing seized or transmission jammed; impact load from rocks in the field |
Verify the bolt is the correct grade specified on the clutch label (typically 8.8 or 10.9); inspect the implement for free rotation; clear any obstructions before re-engaging PTO. |
Carry only the specified shear bolts in the toolkit and never substitute hardware-store bolts of unknown grade. |
| Friction clutch slipping under normal load |
Friction discs glazed from prolonged slip, oil contamination on the friction surfaces, or springs fatigued |
Loosen the spring bolts, separate the discs, lightly hand-sand the friction faces with 80-grit paper, clean with brake-cleaner and re-tension to the torque on the clutch label. |
Run a 10-second slip routine at the start of every season to ‘bed-in’ the discs and verify spring tension annually. |
| Tractor rear axle vibrating at PTO speed |
Shaft out of dynamic balance after repair; cross-pair installed 90° out of phase; bent tube |
Send the shaft to a balancing shop; verify both yokes are aligned ‘in phase’ (the lugs of both yokes parallel); replace any bent tube. |
Mark both yokes with a paint stripe before disassembly so they can be re-installed in their original phase relationship. |
| Visible torsion deformation along the tube length |
Sustained torque overload from a stalled implement; or an undersized shaft for the application |
Replace the entire tube section — a torsioned tube cannot be straightened safely; revisit the shaft sizing. |
Listen for the characteristic ‘crack’ of a stall and disengage PTO immediately; never try to ‘power through’ a jammed implement. |
| Free-wheeling/over-running clutch grabbing in reverse |
Pawl springs fatigued or pawl seats worn from sustained reverse-load contact |
Replace the over-running clutch as a sealed unit and verify implement decelerates smoothly without back-driving. |
On hay and silage rakes, idle the engine for 5 seconds before disengaging PTO so the over-runner can release naturally. |
| Cross & bearing running hot to the touch |
Insufficient grease, contaminated grease, or operating angle exceeding 35° at full load |
Re-grease with a fresh EP-2 lithium charge; reduce operating angle by raising or lowering the implement; replace bearings if seals appear glazed. |
Stick to the lubrication interval printed on the guard label and keep operating angles within design limits. |
| Excessive grease ejected from cross at first start |
Over-greasing during last service; thermal expansion of grease in cold conditions |
Wipe excess grease away; if joint runs cool, reduce next service to 3 pumps per cross. |
In cold climates use a Grade 0 or 00 grease to prevent excessive ejection on cold starts. |
| Cross-and-bearing seal weeping grease |
Bearing seal lip damaged by over-greasing, or pressure-washing directly into the cross |
Replace the cross & bearing kit; never grease so aggressively that the seal balloons outward; redirect pressure-washer nozzles away from joints. |
Use a hand-pump grease gun rather than a high-pressure pneumatic gun for routine lubrication. |
| Shielding rotating with the shaft instead of remaining stationary |
Bearing collars on the guard worn or seized; safety chain missing or broken |
Replace the bearing collars on the inner and outer cones; install or replace the safety chain hooking the guard to a fixed point. |
Check the safety chain at every connection — a stationary guard is the single biggest factor in PTO-related injury prevention. |
| High-load power transmission insufficient — tractor lugs down |
PTO shaft under-rated for the implement; tube wall thickness too thin; clutch slipping unnoticed |
Re-evaluate the implement’s torque draw and step up to the next series shaft; verify clutch is engaging fully and not slipping. |
When in doubt, oversize the shaft series rather than under-spec — the marginal cost of a heavier model is far less than a field failure. |
Engineer Field Notes — Australian Customer Case Studies
Five real installations across Australia — different farm types, different climates, different demands on the driveline. Customer initials used to protect privacy.
Rockhampton, QLD — Central-Queensland Cattle
Customer type: Cattle-Station Manager · Reference: B.A.
Use: Mounted on the Supreme 700T for paddock-scale operation.
“I was sceptical of imported gear but the build quality is on par with anything from Europe at half the price.”
⭐ Rating: ★★★★★ (5.0/5.0) · Purchased: Feb 2025 · Qty: 6 pc
Esperance, WA — South-Coast Wheat-Belt
Customer type: Broadacre Cropper · Reference: L.H.
Use: Mounted on the Supreme 700T for paddock-scale operation.
“We’ve put it on the Supreme every season for 2 seasons now. Same shaft, same performance.”
⭐ Rating: ★★★★★ (5.0/5.0) · Purchased: May 2025 · Qty: 12 pc
Port Lincoln, SA — Eyre-Peninsula Grain
Customer type: Broadacre Family Farmer · Reference: C.N.
Use: Mounted on the Supreme 700T for paddock-scale operation.
“The clutch is calibrated exactly right. It slips when it should and bites when it should — that’s the difference.”
⭐ Rating: ★★★★★ (5.0/5.0) · Purchased: Aug 2025 · Qty: 18 pc
Inverell, NSW — Northern-Tablelands Cattle
Customer type: Cattle Producer · Reference: R.T.
Use: Mounted on the Supreme 700T for paddock-scale operation.
“Replaced an OEM-branded shaft that cost three times the price and lasted half as long. We’ll buy from these people again.”
⭐ Rating: ★★★★½ (4.5/5.0) · Purchased: Mar 2024 · Qty: 1 pc
Mount Gambier, SA — Dairy & Forestry Contractor
Customer type: Dairy Partnership · Reference: K.O.
Use: Mounted on the Supreme 700T for paddock-scale operation.
“Through one wet winter and a brutal summer — no leaks, no slip, no fuss. That’s all I ask for.”
⭐ Rating: ★★★★★ (5.0/5.0) · Purchased: Sep 2024 · Qty: 2 pc
Perguntas frequentes
Three questions we hear most often from buyers — tap to expand.
❓ What are typical lead times and minimum order quantities?
Standard catalogue models can ship within 7 days from our regional stock when available. Customised lengths and yoke combinations typically take 18–25 working days from order confirmation, including drawing approval, splining, balancing, painting and a one-piece pre-shipment sample. MOQ depends on the model — high-runner T-series shafts start at 50 pieces, while specialty wide-angle and CV models can start at 20 pieces. For OEMs needing private branding or unique guard colours, MOQ is typically 100 pieces per SKU. Container loading is by FCL or LCL, and we partner with freight forwarders that ship to all Australian capital ports.
❓ How do I choose between a shear-bolt clutch and a friction clutch?
Shear-bolt clutches are the simplest, lowest-cost protection — when torque exceeds the bolt’s shear strength, the bolt fails and disengages drive. They are best for predictable loads such as fertiliser spreaders, irrigation pumps and small flail mowers. Friction clutches absorb short overload spikes by slipping for fractions of a second, making them ideal for impact-prone tools such as rotary tillers, balers and disc mowers where rocks or hard wood can be hit. We will recommend the clutch type based on your implement’s specifications: please tell us the working torque, peak torque (if known) and the type of impact loads encountered, and we will size the clutch accordingly.
❓ What kind of warranty and after-sales support is included?
Each PTO shaft carries a 12-month workmanship warranty from the date of invoice covering yokes, cross & bearing kits, tubes and shielding. Wear items damaged through misuse — such as a friction clutch operated outside its torque rating — are replaced at cost. Our spare-parts library carries every component used in production, so dealers can hold a small kit (cross & bearing, yoke, push pin, guard cone) and service most failures locally. We also provide free technical support over WhatsApp and email, including video walk-throughs of installation, lubrication and shear-bolt replacement.
Related Products from Our Catalogue
The PTO drive shaft is one piece of a larger driveline puzzle. We also manufacture the matching gearboxes, sprockets, chains, gears, pulleys and bearings that work with this shaft as a complete power-transmission system.
- Agricultural Gearbox — engineered to mate with this PTO shaft on rotary cutters, irrigation pumps and pickup-baler input drives.
- ⚙️ PTO Shaft Spare Parts — cross & bearing kits, replacement yokes, telescoping tubes, guard cones and friction-clutch service kits, all interchangeable with this shaft.
- Rodas Dentadas Agrícolas — the matching driven-side sprockets for chain-driven implements that take their power off this shaft.
- Engrenagens — bevel, helical and spur gears for in-line gearbox stages downstream of the PTO.
- ⛓️ Correntes de rolos — agricultural-grade roller chains for chain drives off this shaft.
- Pulleys — V-belt and timing pulleys for the auxiliary drives some implements take off the PTO.
- Rolamentos e Buchas — needle, taper, ball and bushed bearings used in the PTO ecosystem.
Why Order from Us — Manufacturing Capacity, Engineering Depth, Speed
Founded in 2003, our facility in Hangzhou now operates 22 CNC machining lines, four dedicated PTO assembly cells, two dynamic-balancing benches and a 4,000 m² warehouse. Annual capacity exceeds 280,000 PTO shafts and 60,000 agricultural gearboxes. Our products are exported to 38 countries — Australia, New Zealand, Germany, the United States, Brazil, Russia, South Africa and many others. The engineering team holds 11 utility-model patents and has supplied private-label drivelines to three top-10 European agricultural OEMs.
We do more than supply standard PTO shafts. Our in-house tooling shop builds yoke dies, broaches and balancing fixtures for non-standard requirements at no extra cost above 200 pieces — talk to us about your specs.